
General Documents | > Click Here for FAQs
Classic Dash General Installation Instructions
Classic Dash Universal Wiring Harness (MECHANICAL)
Classic Dash Universal Wiring Harness Instructions (ELECTRIC)
Classic Dash Universal Wiring Harness Diagram
Electric Speedometer Calibration Instructions
Elite Series Wiring Harness Instructions
Ford Electric Speedometer Sending Unit Instructions
Ford Mechanical Speedometer Cable Adapter Instructions
GM / Mopar Electric Speedometer Sending Unit Instructions
GM / Mopar Mechanical Speedometer Cable Adapter Instructions
GPS Speedometer Module Instructions
Holley 6.86″ Installation Instructions
Holley 12.3″ Bracket Instructions
Holley 12.3″ Installation Instructions
Turn Signal, Parking Brake and High Beam Indicator Instructions
1968 Pontiac GTO / LeMans Installation Instructions
1968-70 Mopar B-Body Installation Instructions
1970-72 Pontiac GTO / LeMans Installation Instructions
1987-93 Ford Mustang Installation Instructions
1990-92 Chevy Camaro Installation Instructions
1994-97 Dodge Ram Installation Instructions
1994-04 Ford Mustang Installation Instructions
1995-98 Chevy / GMC CK Truck Installation Instructions
1996-00 Honda Civic Installation Instructions
1998-04 Chevy S10 Truck Installation Instructions
2010-15 Chevy Camaro (Gen 5) Installation Instructions
Tools
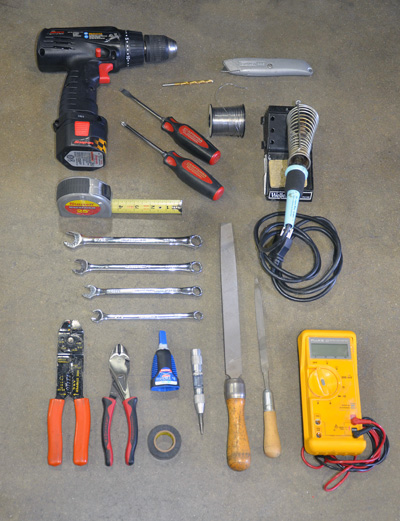
What’s Needed For A Dash Installation:
Before embarking on the installation, we recommend
rounding up the following tools and supplies:
• Side cutter or “dykes” pliers
• Soldering iron with solder (or “red” butt connectors)
• Electrical/crimping pliers
• Multi-meter (voltage tester)
• Drill motor
• 5/32″ drill bit
• Crazy glue
• Center punch or ice pick
• Tape measure
• Screwdrivers (Phillips & blade type)
• Razor blade or box cutter
• Hand files (fine and medium)
• Open end wrench or socket set (3/8″ through 9/16″)
• Shrink wrap with heating device or electrical tape for connections
